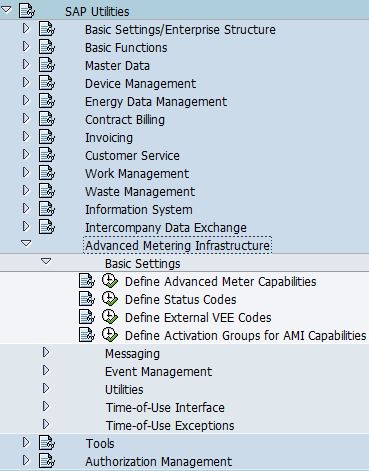
- Go to SPRO -> SAP Utilities -> Advanced Metering Infrastructure -> Basic Settings -> Define Activation Groups for AMI Capabilities

- The purpose of this configuration is to define activation group that can be used to activate or deactivate AMI capabilities of a meter independently of the capabilities of the corresponding AMS (Advanced Metering System) and AMCG (Advanced Meter Capability Group). This is an optional field on meter.
- Enter "Activation Group Name" and its description.

- Select "AMI Capabilities for Activation Group". Assign AMI capabilities to the activation group

- Note: AMS and AMCG must support the capabilities as well if you need to turn on the capabilities in activation group.
Showing posts with label Configuration. Show all posts
Showing posts with label Configuration. Show all posts
Monday, September 14, 2020
AMI: Step 8: Advance Metering Infrastructure of Capability Activation Group (AMICAG)


Friday, August 14, 2020
AMI: Step 7: Determination Group of Advance Meter Capability Group (AMCG DG)
- Go to SPRO -> SAP Utilities -> Advanced Metering Infrastructure -> Basic Settings -> Define Advanced Meter Capabilities

- Select "Determination Group of Advance Meter Capability Group (AMCG DG)". The purpose of this configuration is to determine advance meter capability group. It is assigned to device category, and if default AMCG is selected, it will be assigned to AMI meter during meter creation.
- Enter "Advance Meter Capability Group Determination Group Name" and its description.

- Select "Advance Meter Capability Group of a Determination Group (AMCG DG)". Assign "Advance Meter Capability Group (AMCG)" to this determination group.


Tuesday, July 14, 2020
AMI: Step 6: Capability Group of Device (AMCG)
- Go to SPRO -> SAP Utilities -> Advanced Metering Infrastructure -> Basic Settings -> Define Advanced Meter Capabilities

- The purpose of this configuration is to group functions of a device
- Select "Capability Group for Device". Enter "Advance Meter Capability Group" (AMCG) Number and its description

- Select "Capabilities of Device". Assign "Advance Meter Capabilities" to this device.


Tuesday, June 30, 2020
AMI: Step 5: Advanced Metering System of a Determination Group (AMS DG)
- Go to SPRO -> SAP Utilities -> Advanced Metering Infrastructure -> Basic Settings -> Define Advanced Meter Capabilities
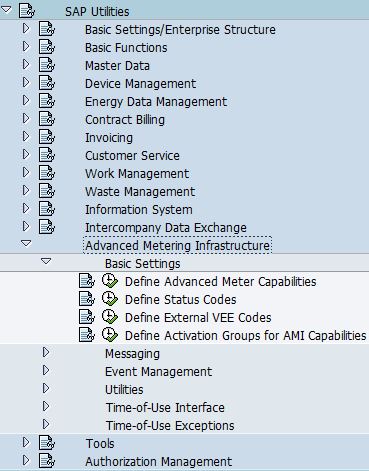
- Select "Advanced Metering System Determination Group". The purpose of this configuration is to group AMS system, this determination group is assigned to device category, if default AMS is selected, it will be assigned to AMI meter during meter creation.
- Enter "AMS Determination Group Name" and its description.

- Select "Advanced Metering System of a Determination Group". Assign AMS to "AMS Determination Group".


Sunday, June 14, 2020
AMI: Step 4: Advance Metering System (AMS)
- Go to SPRO -> SAP Utilities -> Advanced Metering Infrastructure -> Basic Settings -> Define Advanced Meter Capabilities

- Select "Advanced Metering System". The purpose of this configuration is to define system that AMI meter is connected in the advanced metering infrastructure.
- Enter AMS system name, validity date, description of the AMS system, MDUS that it is communicating to, and the capability group of AMS


Thursday, May 14, 2020
AMI: Step 3: Capability Group of Advanced Metering System (AMS CG)
- Go to SPRO -> SAP Utilities -> Advanced Metering Infrastructure -> Basic Settings -> Define Advanced Meter Capabilities

- Select Capability Group of Advanced Metering System. The purpose of this configuration is to group of functions of an advanced metering system.
- Enter "Capability Group Number" and its description

- Select "Capabilities of Advanced Metering System", after that, assign capabilities into this group.


Tuesday, April 14, 2020


Saturday, March 14, 2020
AMI: Step 1: Advanced Meter Capabilities
- Go to SPRO -> SAP Utilities -> Advanced Metering Infrastructure -> Basic Settings -> Define Advanced Meter Capabilities
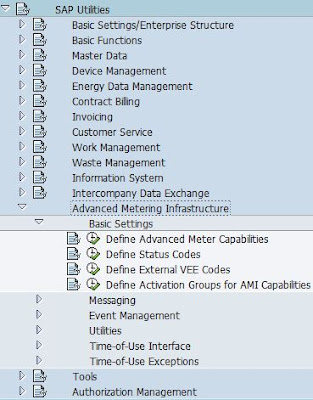
- SAP predefined the following advanced meter capabilities:
- Remote disconnection
- Remote reconnection
- Remote meter reading
- Manual meter reading using AMS
- On-demand meter reading
- Request operational state
- Receive message

- If AMS-Rel. is checked, this capability will be available when configuring Capability Group of Advanced Metering System
- If AMCG-Rel. is checked, this capability will be available when configuring Capabilities of Device
- Use 9000-9999 for custom entries
Sunday, September 1, 2019
Billing: Create Custom Outsort Check (Part 1)
- Go to SPRO -> SAP Utilities -> Tools -> System Modifications -> User-Defined Enhancements for Billing -> Define Check List for Billing

- Enter new billing validation name, and text for the parameters


Tuesday, November 27, 2018
Collection Strategy: BRF: Tips 10: Default Context such as $FKKMAGRP not available
When creating expression to access context, if system default context such as $FKKMAGRP not found, check Additional Settings for Application Class. Make sure "Application" field is "Collections Management".

Thursday, August 17, 2017
Collection Strategy: BRF: Option 2: Step 5: Define Additional Settings for Application Class
- Go to SPRO -> Financial Accounting (New) -> Contract Accounts Receivable and Payable -> Business Transactions -> Dunning -> Dunning by Collection Strategy -> Settings in Business Rule Framework -> Define Additional Settings for Application
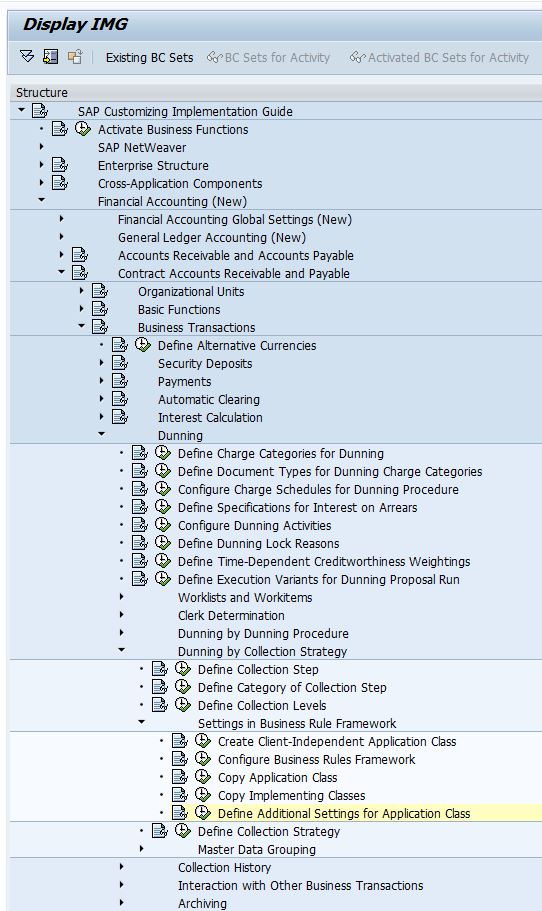
- Configure application class and choose appropriate Application, for collection strategy, this should be Collections Management.

|
Field
Name
|
Usage
|
|
Application
Class
|
Application Class that you have created for
Collection Strategy
|
|
Application
|
Application that is calling this application class:
·
TOBJ - Object-Based Tax Calculation and
Validation
·
TFOR - Form-Based Tax Calculation and
Validation
·
COLL - Collections Management
·
PTAX
·
0001
·
REF1 - Refund Process
·
REG1 - Registration Process
|
|
Time-Dependent
|
Whether the BRF objects are time-dependent
|
|
NoEndTime
|
Excluding End Time, for example, the validity date is from 2/1/2013 to 2/1/2015, if this is
selected, 2/1/2015 will be excluded.
|
|
Time Unit
|
Day or Hour
|
Thursday, July 27, 2017
Collection Strategy: BRF: Option 2: Step 5: Create Second Action to Determine Collection Step
- Right click on "Actions" node, select "New Action".

- Enter Action Name.

- Enter Short Text Name

- Add Implementing Class: 0FICACS001, after that, click "Save" button.

Tuesday, June 27, 2017
Collection Strategy: BRF: Option 2: Step 4: Create First Action to Obtain Context
- Right click on "Actions" node, select "New Action".

- Enter Action Name

- Enter Short Text Name

- Add Implementing Class: 0FICAIN001.

Friday, May 26, 2017
Collection Strategy: BRF: Option 2: Step 3: Create Event
- Right click at "Events" node, click "New Event".

- Enter the event name, this will be configured in Collection Strategy.

- Implementing Class: 0FICAEVENT

- Controller Class: CL_FKK_BRF_EVENT

- After that, click "Save" button.

Wednesday, April 26, 2017
Collection Strategy: BRF: Option 2: Step 2: Add FICA Implementing Class (BRFIMC01)
- Go to t-code BRFIMC01.

- Add the following implementing classes to the application class:
- 0FICACS001
- Short Text: Determine Collection Step and Evaluation Number
- Class Type: A
- Implementing Class: CL_FKK_BRF_AC_COLLECTION
- Maintenance Class: CL_FKK_BRF_AC_COLLECTION_MNT
- Icon/Symbol: @BC@
- Object Name for Title: Define Collection Step
- Title for Create: Create Rule &1 Collection Step and Valuation Number
- Title for Change: Change Rule &1 Collection Step and Valuation Number
- Title for Display: Display Rule &1 Collection Step and Valuation Number

- 0FICADR001
- Short Text: Access Context Information
- Class Type: F
- Implementing Class: CL_FKK_BRF_DATA_REQUEST
- Maintenance Class: CL_FKK_BRF_DATA_REQUEST_MNT
- Icon/Symbol: @71@
- Object Name for Title: Access Context
- Title for Create: Access Context Information Create &1
- Title for Change: Access Context Information Change &1
- Title for Display: Access Context Information Display &1

- 0FICAEVENT
- Short Text: Impl.Class for Events
- Class Type: E
- Implementing Class: CL_FKK_BRF_EVENT
- Maintenance Class: CL_EVENT_MNT_BRF
- Icon/Symbol: @5M@
- Object Name for Title: Event
- Title for Create: Create Event &1
- Title for Change: Change Event &1
- Title for Display: Display Event &1

- Maintenance Class for Rules: 0RULES

- 0FICAIN001
- Short Text: Obtain Context Data
- Class Type: A
- Implementing Class: CL_FKK_BRF_AC_BUFFER_INIT
- Maintenance Class: CL_FKK_BRF_AC_BUFFER_INIT_MNT
- Icon/Symbol: @5Y@
- Object Name for Title: Obtain Context Data
- Title for Create: Get Context Data &1 Create
- Title for Change: Get Context Data &1 Change
- Title for Display: Get Context Data &1 Display

- 0FICAMSG001
- Short Text: Issue Message
- Class Type: A
- Implementing Class: CL_FKK_BRF_AC_MESSAGE
- Maintenance Class: CL_AC_MESSAGE_MNT_BRF
- Icon/Symbol: @0S@
- Object Name for Title: Issue Message
- Title for Create: Issue Message Create &1
- Title for Change: Issue Message Change &1
- Title for Display: Issue Message Display &1

- 0RULES
- Short Text: Rules for Events
- Class Type: R
- Maintenance Class: CL_RULES_MNT_BRF
- Icon/Symbol: @03@
- Object Name for Title: Rules in Event
- Title for Change: Change Rule &1
- Title for Display: Display Rule &1

Sunday, March 26, 2017
Collection Strategy: BRF: Option 2: Step 1: Configure Business Rules Framework (BRF)
- Go to SPRO -> Financial Accounting (New) -> Contract Accounts Receivable and Payable -> Business Transactions -> Dunning -> Dunning by Collection Strategy -> Settings in Business Rule Framework -> Configure Business Rules Framework

- Click on "Wizard" button.

- Start: Click "Continue" button.

- Define Application Class (Cross-Client): Enter Application Class Name and Description, After that click "Continue" button.

- Define Cross-Client Settings:
- Trace Class: CL_TRACE_BRF
- Impl. Tree Class: CL_WB_TREE_DEFAULT_BRF
- General Services: CL_FKK_BRF_APPLCLASS_SERVICES. After that, click "Continue" button.

- Select Object Types (Implementing Classes): Click "Continue" button.

- Edit Short Texts of Object Types: Click "Continue" button.

- Define the First Context: Click "Continue" button. (We don't want to create Context over here because Dunning is getting Context differently)

- Define the First BRF Event: Click "Continue" button. (We don't want to create Event over here because Dunning is using different Implementing Class)

- Complete: Click "Complete" button.

Subscribe to:
Posts (Atom)